Zorki 1 - Transformation of an Ugly Duckling - The Case
During the production of Zorki cameras, a leather case with a narrow leather strap was sold alongside them. While the origins of this design can be traced back to Leica, there are some differences between the two. Specifically, there are variations in the overall quality of materials and manufacturing. However, in my opinion, the vintage feel of the Zorki case is quite appealing and they appear to be more durable than the original Leica cases. Zorki cases are constructed with thicker leather and tend to withstand the effects of aging better. In fact, on online auction sites such as eBay, many original Leica cases are overpriced or show signs of significant wear and tear. In contrast, most Zorki 1 cases are in better condition and simply display a desirable patina.
In my opinion, it is not advisable to use a vintage camera case in its original state. This is because the old stitches that hold the leather pieces together may no longer be strong enough to provide adequate support. Additionally, the leather straps of the case are can easily break over time, posing a safety risk to your camera. Therefore, it is recommended to have the case reconditioned and the straps replaced with more durable and reliable materials before using it to carry your camera.
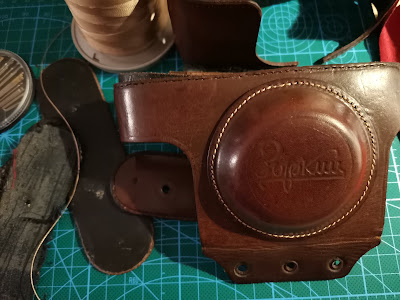
To restore a vintage camera case, I begin by applying leather grease to recondition the leather. Next, I carefully remove all the old threads, which can be a time-consuming process, but it is essential to ensure that no remnants of the old yarn remain in the holes. I also remove any old rivets that keep the cover attached to the rest of the case. Once this step is complete, the case will be separated into its individual pieces of leather, ready for further restoration.
With the vintage camera case separated into its individual pieces of leather, the cleaning process becomes much easier. I typically use saddle soap and a moist (but not wet) microfiber cloth to clean each piece of leather thoroughly. Once cleaned, I wait for the leather to completely dry before applying a layer of leather grease. Sometimes, I also use a small amount of brown shoe polish for a finishing touch, but I make sure to wipe it thoroughly to avoid any potential stains on clothing.
After stitching the pieces back together, I apply a final layer of transparent shoe creme or shoe polish to achieve the best effect. However, before reassembling the case, it is a good idea to fabricate a new lining. I have noticed that different materials were used for linings in vintage cases. For cases with natural suede lining, I try to reuse the existing fabric if possible. For others, I use synthetic fabrics like ultrasuede, using the old lining as a template to ensure an accurate fit.
To begin restitching the vintage camera case, I first attach the lining to the body of the case. In original cases, there is often a small pocket on the back of the case designed to hold a plastic card for note-taking. If a piece of leather has already detached from the case and is missing, I take this into consideration when cutting out templates for the new lining.
This is also the best moment to attach strap holders. There are many possible approaches, and one option is to replicate the initial setup by attaching the leather strap directly to the camera. However, I am not very fond of that solution as the original strap is too narrow and uncomfortable for my neck. Instead, I prefer to have holders that allow me to attach any strap available on the market. To achieve this, I use similar leather pieces as mentioned above and attach strap rings to them, then attach them to the case with two rivets - just as the original. I fold the loose end and connect it with one more rivet as shown in the photo below. I have also used some other methods depicted below.
In order to be able to detatch the cover from the case I fit fasteners instead of rivets that connect both parts together.
Before we move to the next step you will need to remove the bottom screw. Otherwise you won’t be able to access the holes with a needle while re-stitching.
For restitching I use polyester yarn:
- Three-ply
- Material: 100% polyester filament
- Thread weight: 150 tex (500 dtex x 3)
The stitching procedure is well described on YouTube, so I won’t cover it here. It’s much easier to look it up there. I use one thread with two needles attached to both ends. Just make sure you have a thread that’s long enough. As a rule of thumb, I use the length of the stitching area multiplied by three. Before you start, it’s good to make sure that the holes in the leather are treated with leather grease – it will soften them, preventing the leather from getting damaged. You don’t need a thick needle – you are just following the already existing leather, so the needle should easily go through them. However, a needle that's too thin may break. There’s no brute force required.


Comments
Post a Comment